
| |
Louisiana Central Railroad Company |

|
Here's the corner where I needed
the access. The mainline will enter this section at right,
curving around near the center to enter the yard off to the
left. There will be a wye located just to the right of that
boxcar, with it's tail track headed straight into that curved
corner. I needed access to that corner. If you look closely, you can see some of the track centerlines. The tail track of the wye is visible leading up to the corner. The curved mainline will actually cross this tail track just above the switch. OK, where's the lift-up, you ask? Well, it's right there in the center under that boxcar. The seams are very tight (merely the thickness of a saber saw blade). I'm hoping they won't be very noticeable after the scenery is done. |
|
|
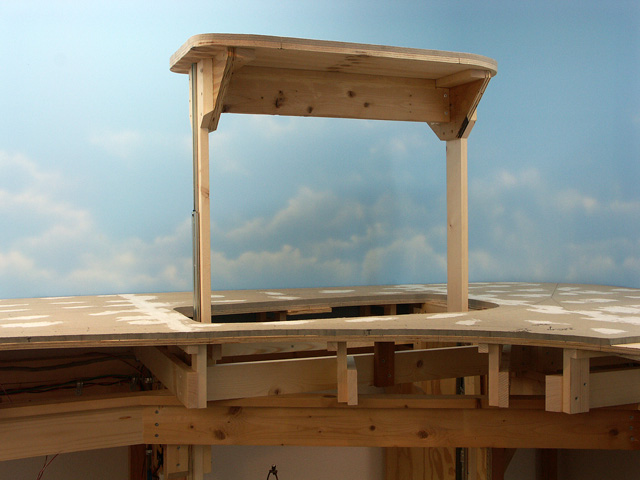
And here’s the view of the lift-up
in the raised position. The center cross brace is about 3″
above my head. I can comfortably reach the corner over to
the right now. The top is 1/2" Homasote laminated to 1/2" plywood. I did the lamination to the entire tabletop shown here, then cut the opening out with a saber saw. I cut from the bottom side so as to keep the top Homasote edge clean. If you've ever cut Homasote with a saw, you know what I mean. The vertical support boards are 1"x2-1/2", ripped from a 1"x6". The gussets are 3/4" plywood cut from scraps. The rest of the small pieces are 1"x2"s. The center brace is a scrap of L-girder left over from the benchwork construction. The drawer guides are heavy duty, full extension models purchased from Lowes. The tabletop here is 53" high, so I found that 24" drawer guides were perfect for my height. |
|
|
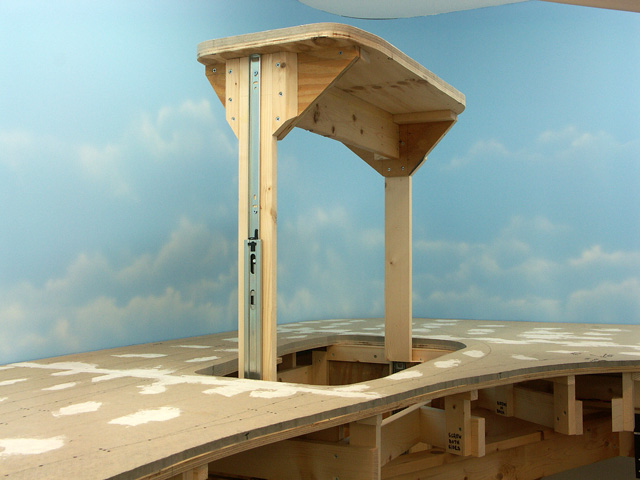
And here’s another view of the
lift-up in the raised position. This shows how I braced the
sides a bit better. The 1"x2" pieces on either side of the
drawer glide support add extra rigidity to the assembly.
They're probably overkill, but it only took a few minutes to cut
them and screw them on. The plywood gussets are glued to 1"x2"s on the flat similar to an L-girder. This allows all the fastening screws to be on the underside (no fasteners are on the top surface). The drawer glides I used have release latches in them and it’s easy to lift the hatch and support legs completely out of the hole. After setting the assembly aside, the area all around the hole is completely unobstructed. I also can then stand on a stool if need be to enable an even further reach into the corner and to get my tired old eyes closer to the work. That might be useful when scenery work begins. If you study the photo closely, you'll notice that the cut-out opening isn't symmetrical. It's tucked in to fit within the track arrangement to be installed here later. The track centers are (barely) visible; the curved line just to the right of the opening is the left (west) leg of the wye. |
|
|
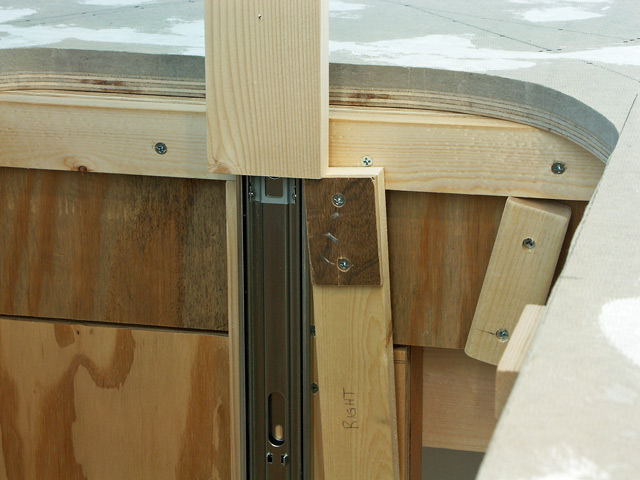
Here's a closeup of the pivoting
"cleat" used to hold the lift-up in the raised position.
There are one of these on each side. The 1"x2" only engaged
the vertical support near it's edge, so I added a little scrap of
plywood paneling that I had on hand to give the vertical support a
bit more surface to rest on. The angled block is the stop for the cleat when it's pivoted clear of the vertical support. You'll see that further down. Also seen here is the ledge that the lift-up top rests on when in the lowered position. There's another ledge like this on the opposite end. There are also some short support pieces on the two perpendicular sides which meet the top at it's midpoint. You can see one of those here, and the other support two photos above. |
|
|
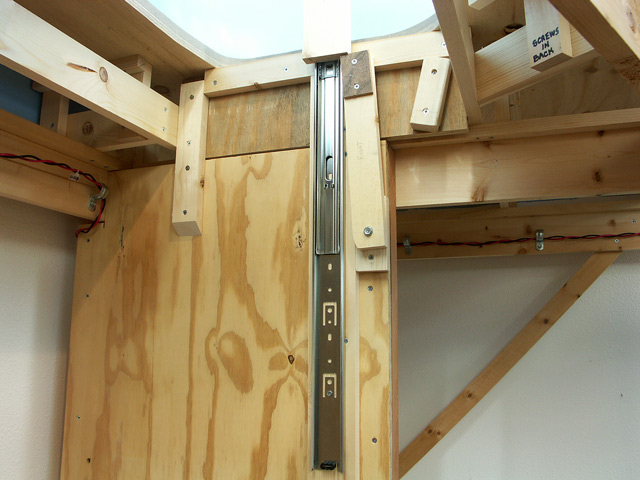
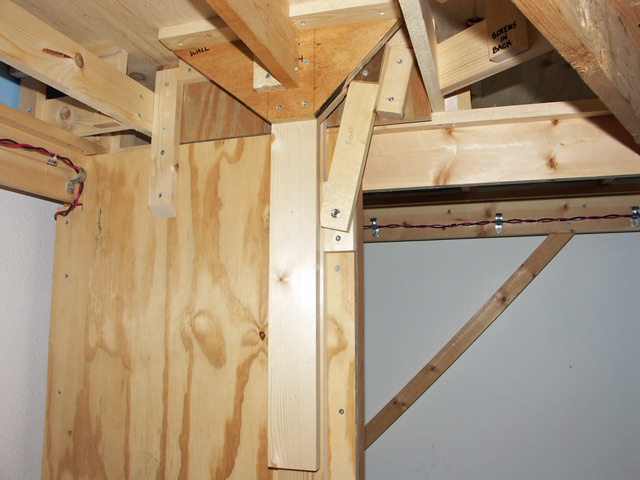
Looking underneath the benchwork,
we see the drawer glide screwed to another 1"x2-1/2", in turn
screwed to the plywood side of the "cubby". The horizontal
ledge at top and the vertical 1"x2-1/2" create a "tee".
There are a pair of 2"x2" legs on the other side of the plywood,
thus it's doing double duty as a support for the drawer glide, and
as the sway bracing for the leg set. The assembly on the
opposite end has yet an additional function, serving as an
electrical backboard for the electronics controlling the railroad. You can also see the pivoting cleat and stop assembly here in it's entirety. |
|
|
And here’s the view with the
lift-up in the lowered position. The reason the pivoting
cleat is as long as it is becomes clear in this photo. It
was necessary for it to clear the plywood gusset bracing on the
rear of the plywood gusset. Note the stop for the pivoting cleat. This makes it easy when releasing the cleats to just rotate them until they hit the fixed stops, no looking necessary. The entire assembly is rigid and strong enough to lower right down into the hole without fidgeting with the alignment. It just closes right! The lift-up works quite well, is easy to operate, and I’m very pleased with it. |
| © 2006-2014 Jack C. Shall - All rights reserved. | Last page update: 13 May 2014 |